Class
Magazine Web.
Part One-- Getting Started.
-
Open Netscape. Open Composer by clicking the little pen and
paper in the lower right corner. This is your editing window.

-
Put your disk in and double-click on MY COMPUTER, and then
on 3 1/2 Floppy, and open your essay.
-
Press Control A to select all, and press Control
C to copy it.
-
Switch back to your editing window
 ,
and press Control V to paste the essay in.
,
and press Control V to paste the essay in.
-
Save:
-
Click the Save button.
-
Use the drop-down to find your name/space on the server.
-
Click the little folder icon
 to create a folder called web.
-
Double click on it.
-
Name the file index and click save.

-
When the window for titling the page comes up, title the
page "Web for <insert your essay's title here>."
-
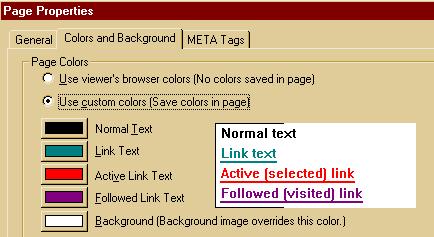
Format the essay...Fonts, etc. Page and link colors can be
adjusted by choosing Format menu, and Page Colors and Properties.
-
Save.
-
Now you must decide on what words to make links out of to
explain and expand on the essay. These will link to pages where you explain/expand
parts of the essay or poem, like,
-
historical background
-
cultural references
-
explanations of what you mean/interpretations
-
vocabulary
-
biographical
-
extra information
-
See the rubric for all the requirements. Remember that your
web must go at least three layers deep, so some of your required
links can be in the second layer. Decide on the keywords from the essay
and fill in the chart.
-
filenames should be
8 or fewer characters, no spaces, no caps
-
page titles should be capitalized and appropriate
-
Then create each of the files by clicking on the New button.
-
Choose Blank Page.
-
For now, just type the title or keyword at the top of
the page. You'll come back and write these pages soon.
-
Save, name and title like you did with the index page.
Part Two -- Linking!
-
Select one of your keywords or phrases, and when your cursor
turns into a little hand, right-click and choose Create Link
Using Selected.
-
In this window, click on Choose File .
-
Browse to the web folder you created and find the file you
made for that keyword. Double click on it. You now have a link!
-
Do this with all your keywords and phrases.
-
When you go back to work on the other pages, be sure to
add a link on each of those pages back to the main essay page (index).

-
When you link to an outside site -- like when you use a picture
from another site and need to give credit and a link back:
-
Surf to the site with the browser window
 .
.
-
Click once in the url box, and Control C to copy the address.

-
Go back to the editing window,
select the keyword, right-click, choose Create Link Using Selected,
and this time paste -- Control V -- the address in the Link to window.

Part Three -- Pictures!
-
First, using the browser window,
find one you want, right click on it, and choose Save Image As.
-
Save it into the same web folder. You can leave the filename
alone unless it has caps or spaces.
-
Go back to the editing window
and put your cursor where you want the picture to be.
-
Click the button that says Image...
-
...and then Choose File .
-
Find the image you just saved.
-
Be sure that the box that says "Leave image at the original
location" is NOT checked.
-
Done! You might want to surf and save all your pics first,
and then paste them in.
-
Be sure to note where they came from, because you have
to give appropriate credit/citation.